$3 Thrift Store Lamp Makeover With Blue and White Transfers
This easy thrift store lamp makeover uses chalk paint and blue floral transfers to transform a $3 find into beautiful blue and white decor.
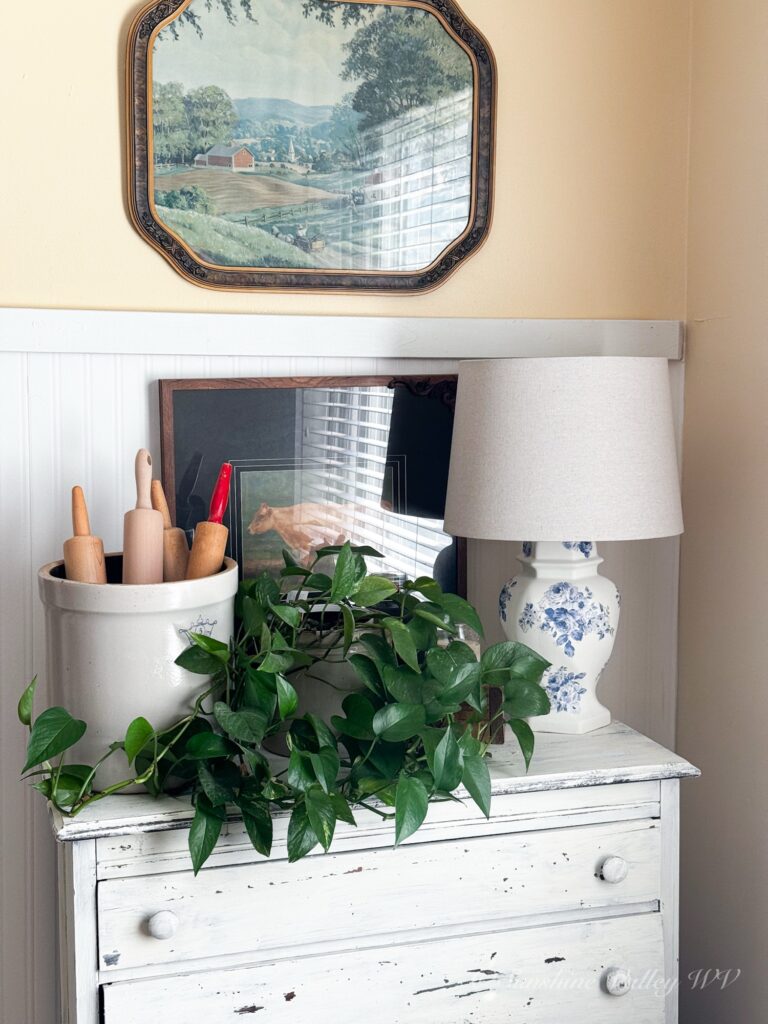
I’ve learned that sometimes the best thrift store finds are not the prettiest things on the shelf. They are the pieces with a good shape, a low price, and just enough potential to make you stop and take another look.
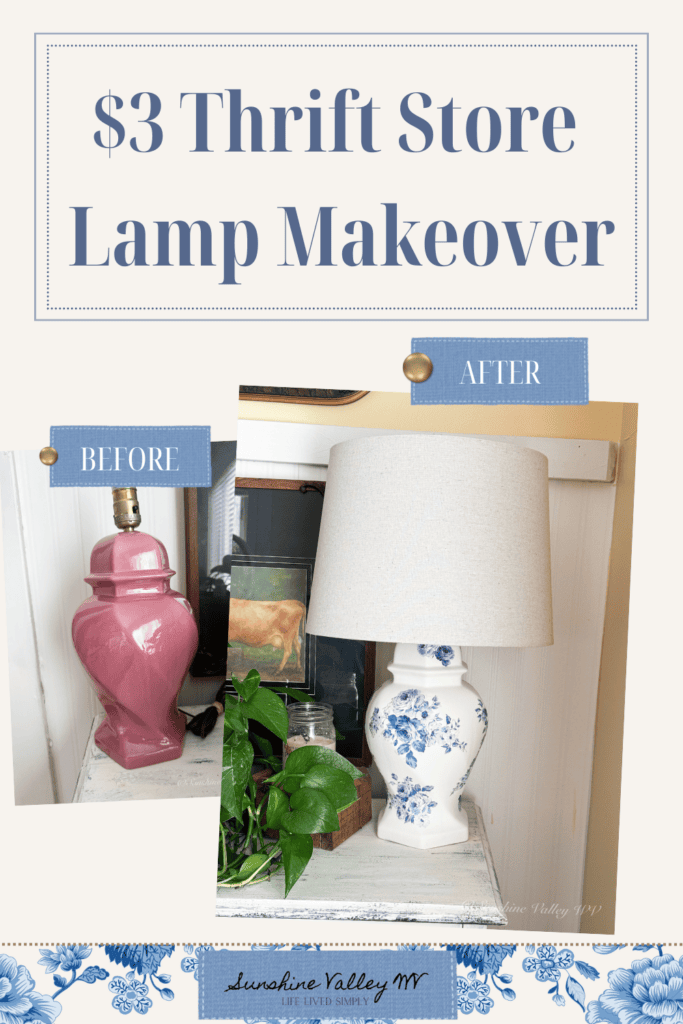
That was exactly what happened when I found this lamp for only $3. I loved its traditional shape, but the original finish did not fit the blue, green, and yellow colors I have been bringing into our old farmhouse. Almost immediately, I pictured it painted white with blue floral details, much like the beautiful blue and white porcelain lamps I have always admired.
With two coats of chalk paint and a set of rub-on transfers from Amazon, the little thrifted lamp became a completely different piece. The makeover was simple, relaxing, and honestly one of the most enjoyable projects I have completed lately.
This post may contain affiliate links. Which means I may make a small commission at no additional cost to you. For my full disclosure click here.
A Simple Blue and White Lamp Makeover
This project required no sanding or primer. I used chalk paint because I wanted a simple finish that would adhere to the lamp without a lot of extra preparation. Since the lamp will sit in a low-traffic area and will not be handled often, I also chose not to seal it.
If you are refinishing a lamp that will be moved frequently or placed where it may get bumped and scratched, you may want to protect the finished surface with a compatible water-based clear sealer.
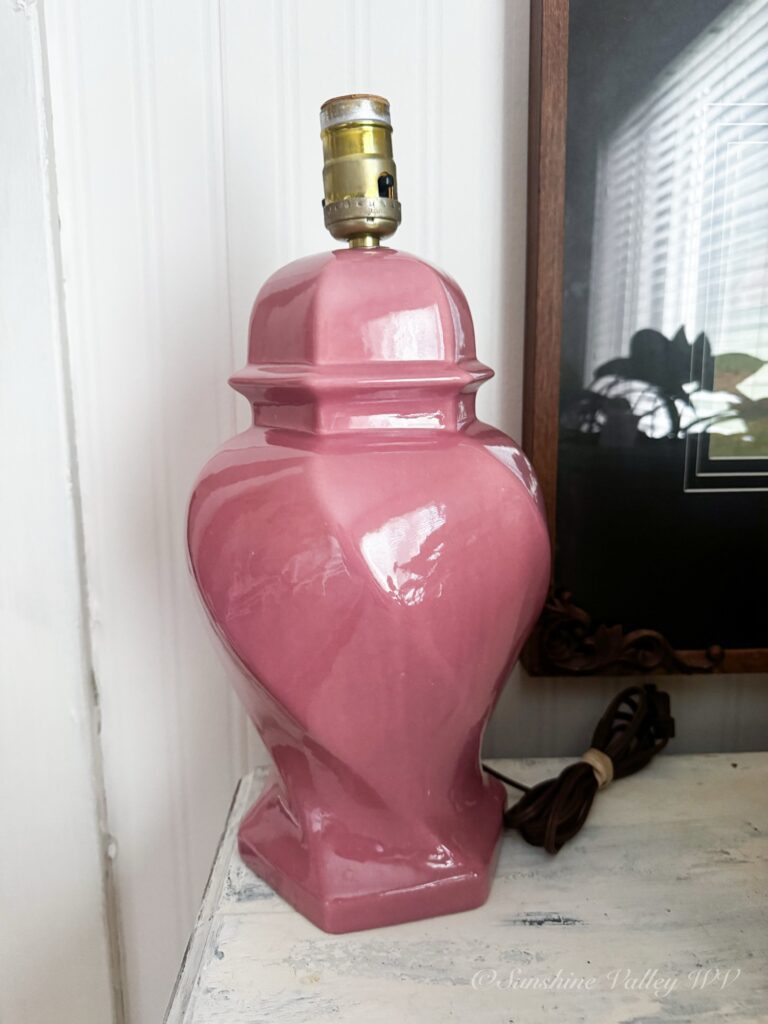
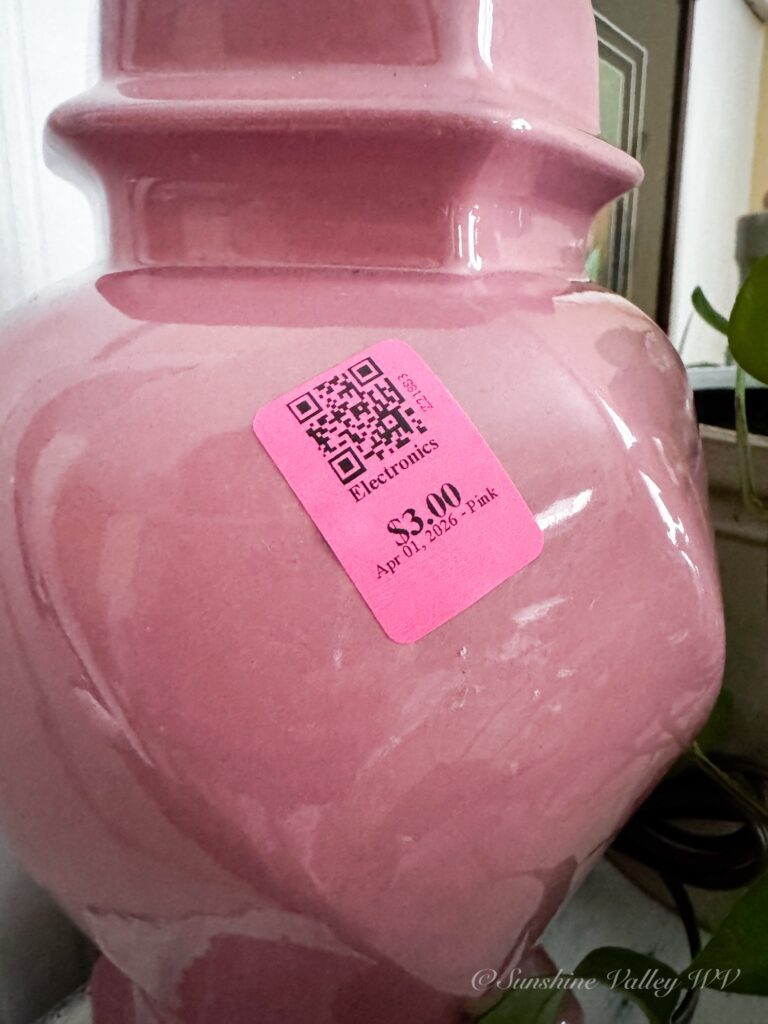
Supplies for This Thrift Store Lamp Makeover
- Thrifted ceramic lamp base
- Waverly chalk paint in plaster
- Small paintbrush
- Damp cloth
- Blue floral rub-on transfers
- Plastic scraper and wooden transfer tools, included with the transfers
- Better Homes & Gardens linen-look lampshade from Walmart
- Scissors
My approximate project cost: $30
The lamp base cost only $3. The transfers and small amount of paint added very little to the project because I did not use the entire package, but the $23 lampshade accounted for most of the finished cost. I cringed a little at spending that much on a shade for a $3 lamp, but it gave the lamp the finished, traditional look I wanted.
How to Paint a Thrift Store Lamp With Chalk Paint
1. Clean the lamp
Before painting, I made sure the lamp was free from dust and that no sticky adhesive remained from the thrift store price sticker. I wiped the base with a damp cloth and allowed it to dry completely.
Because the lamp was clean and the surface was in good condition, I did not sand it. If your lamp has grease, heavy grime, flaking paint, or a very damaged finish, it may need more preparation before painting.
Safety note: Unplug the lamp before beginning. Avoid getting paint or moisture in the socket, switch, cord, or other electrical components. If the wiring is damaged or questionable, have it inspected before using the lamp.
2. Apply the first coat of chalk paint
I brushed on one thin, even coat of Waverly chalk paint. The first coat did not need to look perfect. Its purpose was to begin covering the original finish and create a base for the second coat.
Be careful to smooth out heavy brush marks and catch any drips, especially around curves and decorative details.
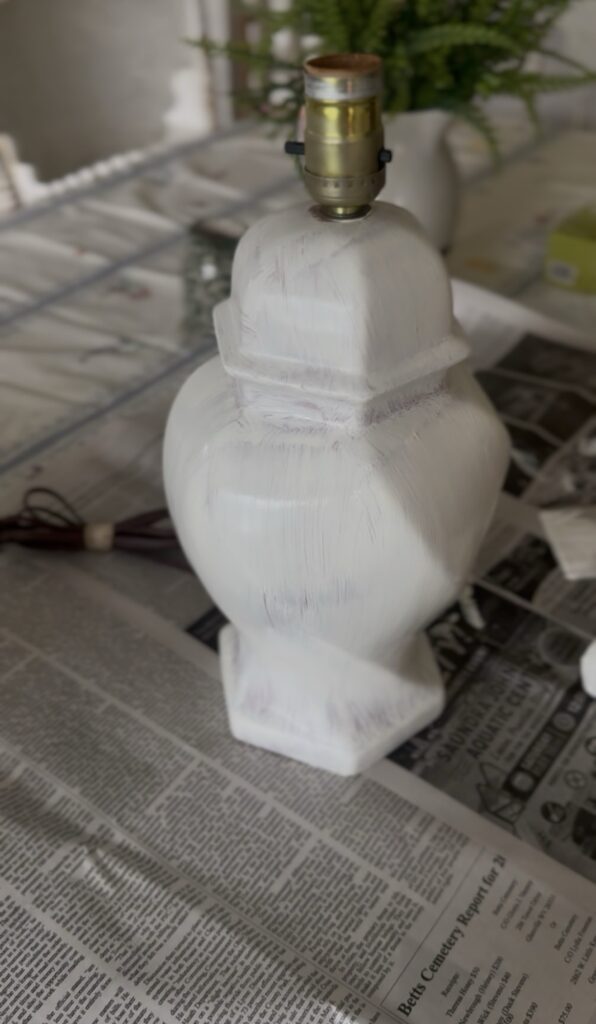
3. Add a second coat
I allowed the first coat to dry for about an hour before applying the second coat. Two coats gave me the white coverage I wanted.
Drying times can vary depending on the paint, temperature, humidity, and thickness of the coats, so check that the first coat feels dry before painting over it.
After the second coat, I left the lamp to dry overnight before adding the transfers. Giving the paint plenty of time to dry helped prevent the transfer adhesive and rubbing tools from disturbing the fresh finish.
4. Plan the transfer placement
The blue floral transfers came on larger sheets, so I cut out the individual flowers and decorative elements I wanted to use. Before removing any of the backing, I arranged the pieces against the lamp to decide where each design should go.
Planning the placement first made it easier to create a collected, balanced look without making the design feel overly perfect.
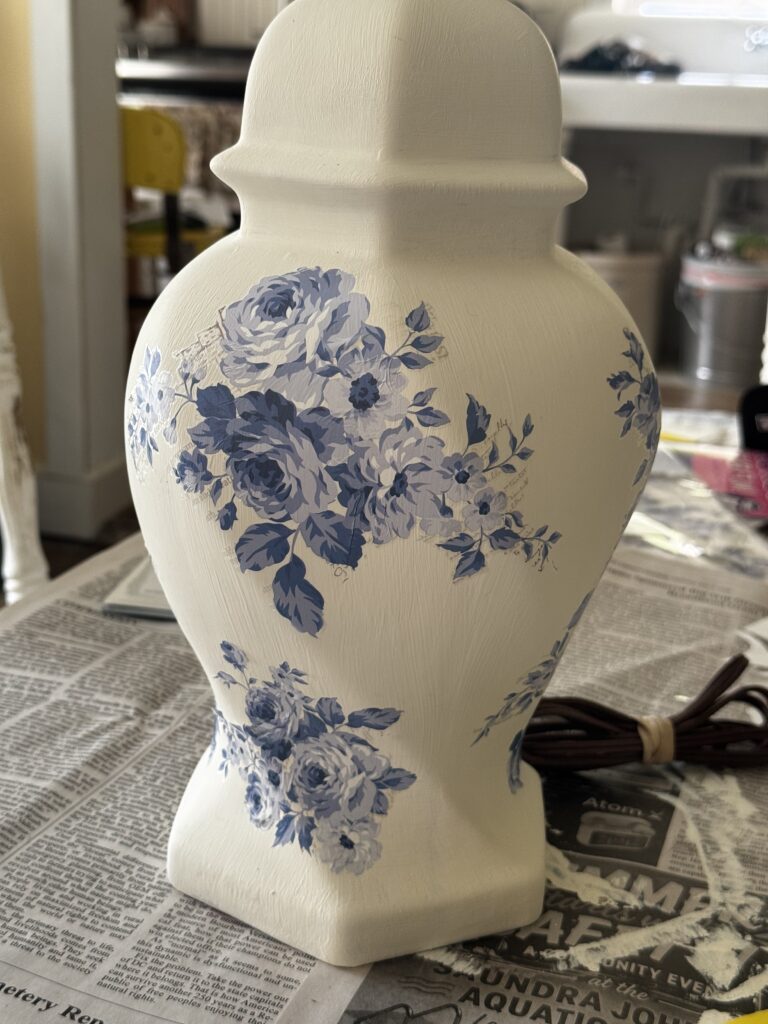
5. Apply the rub-on transfers
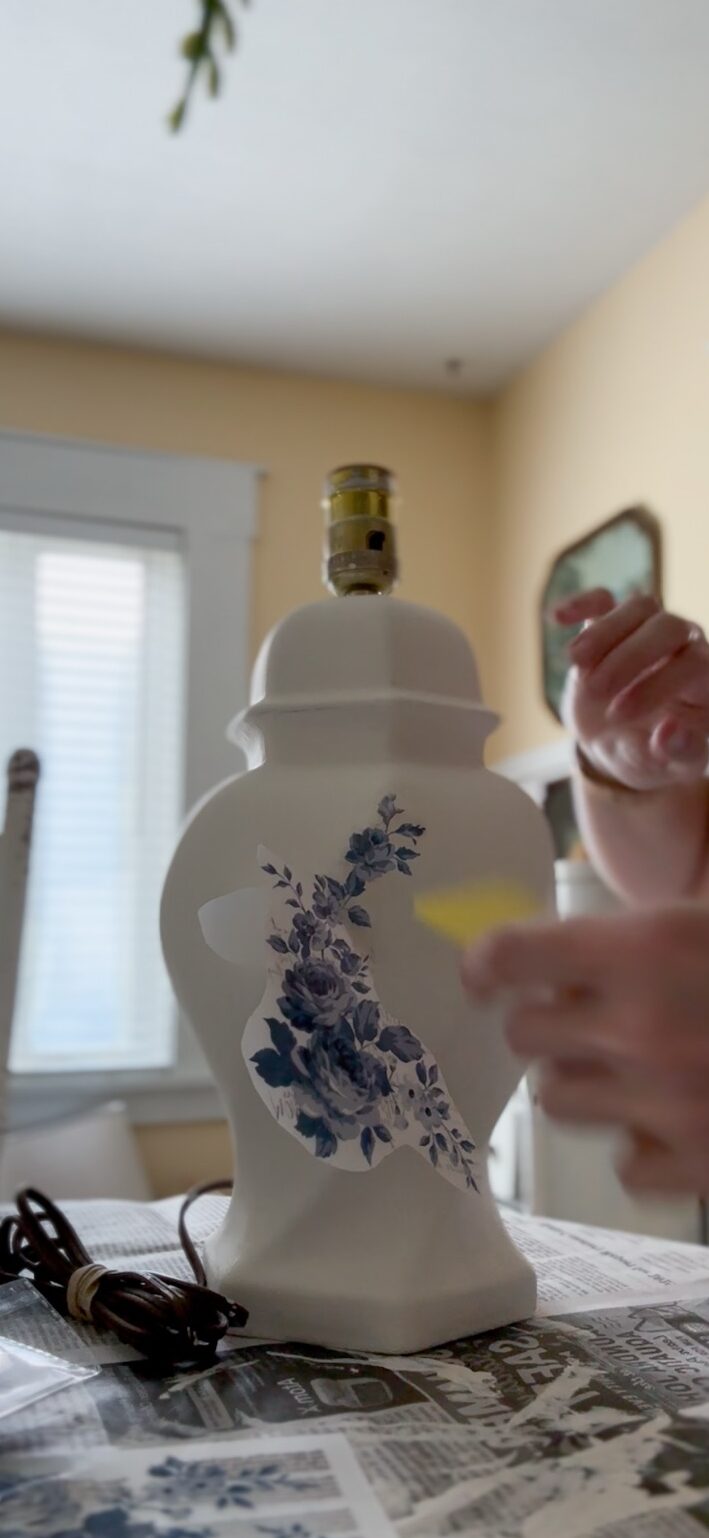
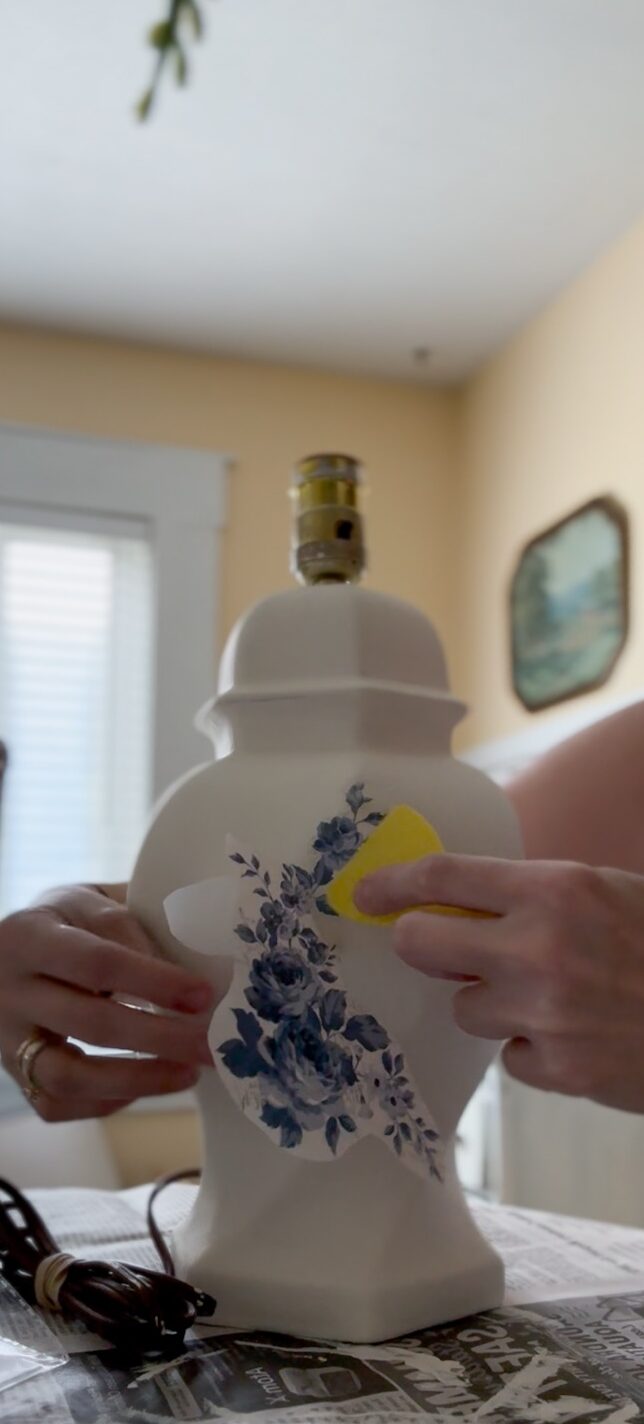
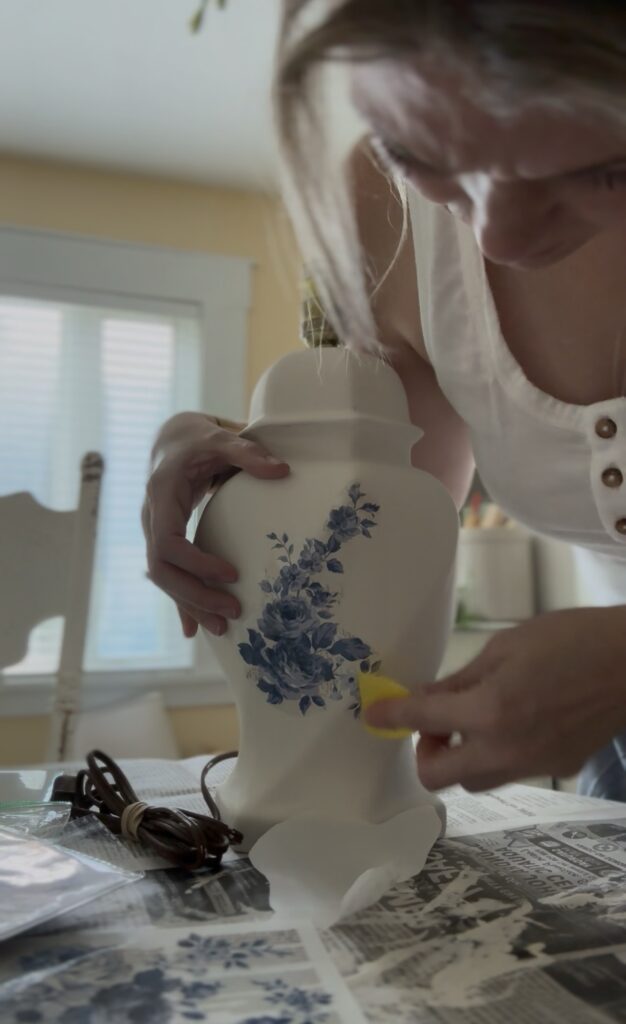
To apply each transfer, I peeled away the backing, placed the design against the painted lamp, and gently rubbed it with the plastic scraper and wooden sticks included in the package.
I worked slowly across the design and carefully lifted the top sheet to check that the entire image had released. If part of the design was still attached to the sheet, I laid it back down and rubbed that area again.
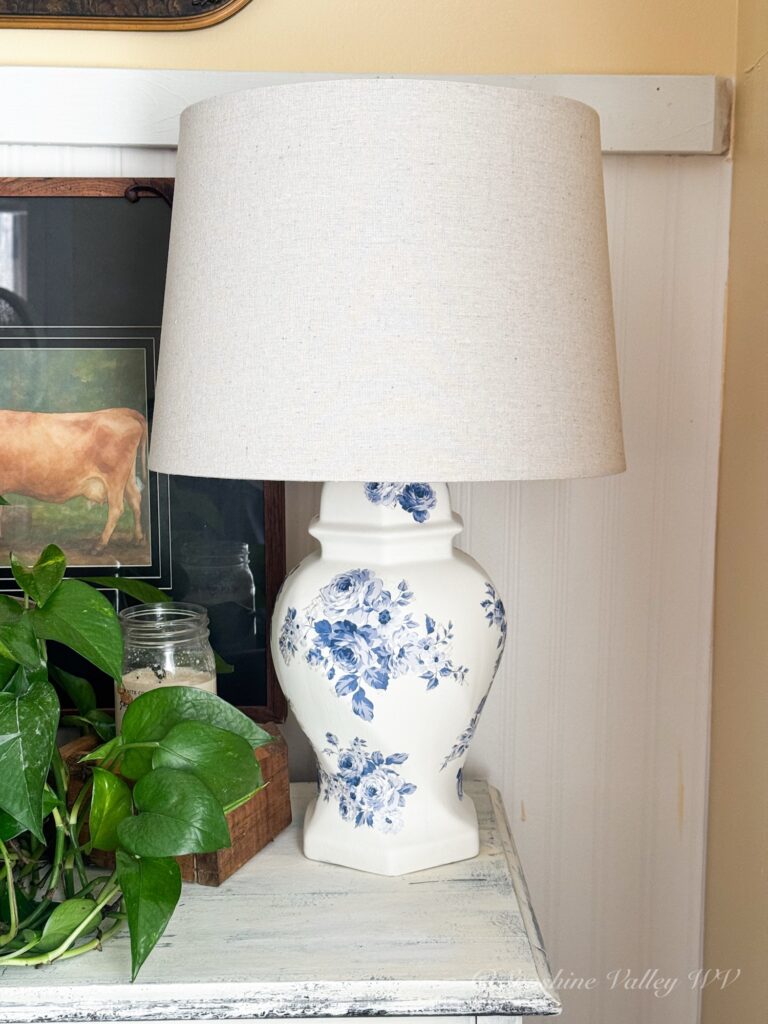
These transfers were surprisingly easy to use. They created the look of hand-painted blue floral details without requiring any painting skill, and this was easily the most enjoyable part of the makeover.
6. Add the lampshade
Once the transfers were finished, I added a Better Homes & Gardens linen-look lampshade from Walmart. The warm, lightly textured fabric worked well with the painted base and kept the finished lamp from looking too bright or stark.
When choosing a replacement lampshade, check the fitter style and measure the lamp before shopping. A simple traditional shade allows the blue floral pattern to remain the focus.
Do You Need to Seal a Chalk-Painted Lamp?
I decided not to seal this lamp. It will receive very little handling, and I do not expect the painted surface or transfers to be scratched during normal use.
For a lamp in a high-traffic area, or one that will be moved and handled regularly, I would add a water-based clear protective finish that is compatible with both the chalk paint and transfers. Always test a sealer in an inconspicuous spot first because some products can affect the paint color or transfer finish.
Was the Thrift Store Lamp Makeover Worth It?
Even with the new shade, the entire lamp cost approximately $30. It was not quite the ultra-cheap makeover the $3 price tag initially suggested, but it is still far less than many new blue and white porcelain-style lamps. More importantly, I ended up with a one-of-a-kind piece that fits our home.
This project was simple from beginning to end. There was no sanding, no primer, and no complicated painting technique. The hardest part was paying $23 for the lampshade! The actual makeover was easy, relaxing, and very enjoyable.
Giving an Old Piece a New Place in Our Home
I love that this lamp began as an overlooked $3 thrift store find. With a little paint and imagination, it now looks like something I might have deliberately searched for in an antique shop.
That is one of my favorite things about decorating with secondhand pieces. A home does not have to be filled all at once with expensive, perfectly coordinated decor. It can come together slowly, one useful and beautiful find at a time.
The finished blue and white lamp adds color, character, and a traditional touch to our old farmhouse. Best of all, every time I look at it, I remember how much fun it was to bring my original vision to life.
Would you have brought this $3 lamp home? Let me know what colors or transfers you would have chosen for it.